classroom visualizer
classroom visualizer
classroom visualizer

classroom visualizer

classroom visualizer

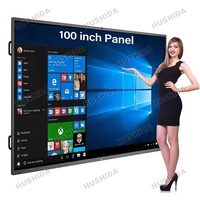
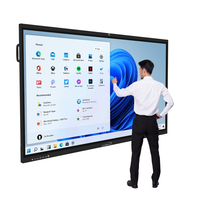
Office Display Classroom Electronic Mobile Smart Board Interactive Whiteboard 75 Inch With Projector
classroom visualizer
classroom visualizer

classroom visualizer

classroom visualizer

classroom visualizer

classroom visualizer

classroom visualizer

classroom visualizer

classroom visualizer
classroom visualizer

classroom visualizer

classroom visualizer
classroom visualizer
classroom visualizer

classroom visualizer

classroom visualizer
Types of Classroom Visualizers
A classroom visualizer is a device that can be used to improve learning in classrooms. It makes learning more interactive, engaging, and interesting. With a classroom visualizer, teachers can present information in different formats. They can show images, documents, and 3D objects on a big screen. This makes it easier for students to understand the lesson. Classroom visualizers are available in different types, and each type has unique features that improve the teaching and learning process. They include;
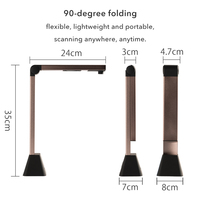
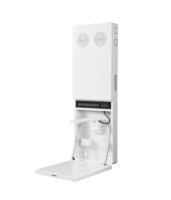
- Portable visualizers: Portable visualizers are small in size and lightweight. They are easy to move around. Teachers can take them from one classroom to another. Also, they are compact enough to fit on the teacher's desk. Portable visualizers are a great choice for teachers who need to teach in different classrooms or schools. They can also be used for outdoor learning.
- Wireless visualizers: Wireless visualizers don't need cables to connect to other devices. They work through Wi-Fi or Bluetooth technology. Teachers can use them to share content from their computers, laptops, or tablets. Also, students can use wireless visualizers to share their work with the class. They can show their presentations, drawings, or experiments from their devices. Wireless visualizers give teachers more flexibility and control over their lessons.
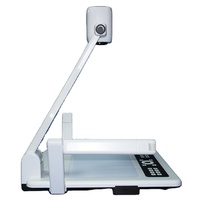
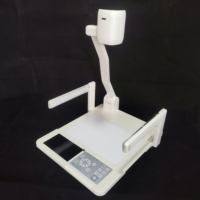
- Document camera visualizers: This type of visualizer has a high-resolution camera that can capture documents, images, and 3D objects. It is usually connected to a computer or a projector. Document camera visualizers are useful for displaying books, charts, and science experiments. They make it easier for teachers to show real-life examples of the lesson. This, in turn, helps students to understand better. Also, document camera visualizers have software that allows teachers to annotate or edit the images before displaying them.
- Digital visualizers: Digital visualizers have built-in cameras and screens. They can capture and display images or videos without the need for additional devices. Digital visualizers allow teachers to record lessons and save them for future use. Students can also access the recorded lessons at any time. Digital visualizers are a great tool for creating a flipped classroom.
Features and functions of the classroom visualizer
- Connectivity: An important feature of a classroom visualizer is its connectivity. It can be connected to a computer, laptop, or interactive whiteboard. This allows images to be displayed on a large screen so that everyone in the classroom can see. Some visualizers can also connect wirelessly.
- Easy to use: Visualizers for classrooms are easy to use. Teachers can take the visualizer camera head and point it at the object. They can then adjust the position of the camera head and zoom in or out if needed. The image will appear on the screen, and students can see it clearly. Some visualizers have buttons that are simple to use, which makes it easy to switch it on or off, zoom in or out, and take pictures or videos.
- Image quality: The quality of the image is crucial for classroom visualizers. High-resolution images are needed for students to see all the details of the object. This will help them to understand the subject better and learn more. A visualizer with a good camera will also be able to take pictures in low light, so images are clear and bright.
- Portability: A portable visualizer can be easily moved from one classroom to another. Some visualizers are small in size and lightweight, which makes it easy to carry them. Teachers can use the visualizer anywhere in the school. This means that students in different classes can benefit from the visualizer. It can also be used for outdoor activities, such as field trips or sports events.
- Storage: Visualizers for classrooms have storage options. They can store images and videos that have been taken. This is useful for teachers because they can save the media and use it again in the future. They can show the same pictures or videos to students in different classes. Some visualizers also have a slot for a memory card, which means that more images and videos can be stored.
- Real-time video streaming: A classroom visualizer can stream live video. This means that teachers can show students what is happening in real time. For example, the visualizer can be used to show a science experiment. Students can see the experiment taking place, even if they are not close to it. The live video stream can also be recorded so that it can be watched again later.
Applications of a classroom visualizer
Classroom visualizers have many applications in schools, particularly in the digital age. Instead of traditional chalk and board methods, visualizers are used for instruction, where a camera projects the image of a document or object onto a large screen or monitor. It is mainly used in science and art classes because it allows students to see scientific experiments in real-time or watch the painting of a picture. It helps students who have different learning abilities to understand the subject clearly. This, in turn, increases their retention and understanding of the topics taught. Furthermore, students can engage in interactive learning with the visuals or visuals aid in the classroom visualizer. As a result, this makes learning more fun and interesting. The variety of visual images and videos used in the classroom can cater to different learning styles, improving student performance and productivity. It helps students to develop their research skills that they can use in their future careers. Additionally, as students work on their research projects, they can use the classroom visualizer to showcase their findings and share them with their classmates. Visualizers are used to show demonstrations during staff training sessions. Teachers can learn new teaching methods and techniques through live demonstrations shown on the classroom visualizer. They can also ask questions and seek clarification in real-time. This promotes continuous professional development, which ultimately improves the quality of education imparted to students. In brief, the use of visualizers in the classroom goes far beyond simply displaying documents or objects. It fosters a more interactive and engaging learning environment that accommodates diverse learning styles, enhances student performance, and supports professional development among educators. Its versatility makes it a valuable educational tool that can contribute to overall academic excellence. With this in mind, schools should invest in quality visualizers and incorporate them into their teaching strategies to realize these benefits fully. They are a valuable tool that can enhance the teaching and learning process. When used effectively, a classroom visualizer can have a positive impact on student engagement, knowledge retention, and academic performance. It is important to provide students with a good visual learning experience so that they will be able to grasp the concept being taught and succeed in their academic journey.
How to Choose a Classroom Visualizer
When choosing a visualizer for the classroom visualiser, there are many factors to take into consideration, including the size and weight of the device. It is important to ensure it is portable and easy to move from one location to another. The ease of use is another important factor to consider when selecting a visualizer for the classroom. Teachers should be able to set it up quickly and navigate its functions without any difficulty.
The compatibility of the visualizer with other devices is another important factor to consider. It should work well with tablets, smartphones, and laptops. It is also important to select a visualizer with recording capabilities and annotation tools so that teachers and students can add notes to the images. The resolution of the visualizer is another important factor to consider. It should provide clear and sharp images so that students can view the content easily.
When choosing a visualizer for the classroom, it is also important to consider the connectivity options it offers. It should be able to connect to different devices through HDMI, USB, and wireless connections. It is also important to consider the lighting conditions of the classroom when selecting a visualizer. The device should be able to adjust its settings to provide clear images in different lighting conditions.
The price of the classroom visualiser price is also an important factor to consider. It is important to select a device that offers good value for the money. It is also important to consider the brand and reputation of the manufacturer when selecting a visualizer for the classroom. Buyers should also look for additional features that enhance the overall user experience. For instance, they should look for visualizers that offer tilt and zoom features to adjust the position of the camera. Magnification and image stabilization features are other important aspects to consider.
When choosing a visualizer for the classroom, it is also important to consider the software it uses. It should be easy to install and update. The software should also be user-friendly and offer a wide range of features, including recording capabilities, annotation tools, and screen sharing. It is also important to consider the size of the visualizer's camera. Buyers should look for cameras with at least 8 megapixels to ensure they provide high-quality images.
Q and A
Q1. What is the purpose of a classroom visualiser?
A1. A classroom visualiser is a tool used to present and display pictures, documents, and 3D objects. It is mainly used in educational institutions, primarily in classrooms, to enable students to project and see what is being presented, making the learning process easier and interactive.
Q2. How do I set up a classroom visualiser in a classroom?
A2. To set up a classroom visualiser, one has to first unbox the visualizer and then find a convenient place to position it. Once that is done, one can connect the visualizer to a power source. After connecting it to a power source, connect the visualizer to a display device or projector. After connecting it to a display device or projector, one can then turn on the visualizer and the display device. Finally, adjust the visualizer's arm and camera head to ensure the desired position and focus.
Q3. How does a classroom visualizer work?
A3. A classroom visualizer works by replacing the traditional overhead projector with a digital camera. The camera projects real-time images of objects or documents placed under the lens onto a screen or display device. With tools like zoom, autofocus, and built-in lighting, a visualizer can capture and present details of photos, slides, transparencies, negatives, and even 3D objects, making learning more engaging and interactive.
Q4. How do I use a classroom visualiser in the classroom?
A4. An instructor can use a classroom visualiser in a classroom by turning on the visualizer and positioning it in a way that all students can see the displayed object or document. After doing this, place the object, document, or any other thing under the visualizer's camera. After placing it under the camera, the image of the object will be displayed on the screen for all to see, thus making the teaching process more interactive and engaging.