hid conversion kit

hid conversion kit

hid conversion kit

hid conversion kit

hid conversion kit

hid conversion kit
hid conversion kit
hid conversion kit

hid conversion kit

hid conversion kit

hid conversion kit
hid conversion kit

hid conversion kit

hid conversion kit

hid conversion kit
hid conversion kit
hid conversion kit
hid conversion kit
hid conversion kit

hid conversion kit
hid conversion kit
Types of HID Conversion Kit
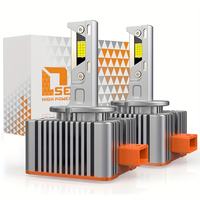
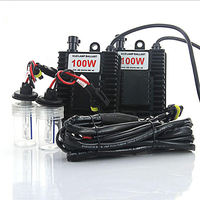
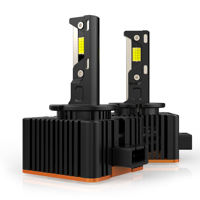
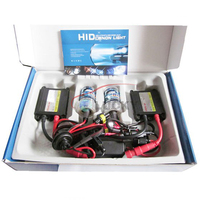
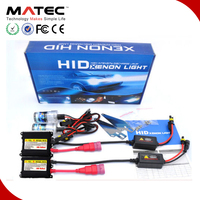
An hid conversion kit is designed to convert standard halogen headlights into high-intensity discharge (HID) lights. HID lights are brighter, more efficient, and longer-lasting than halogen lights. The conversion kit allows drivers to benefit from the advantages of HID lights. It typically contains two ballasts, two HID bulbs, an installation manual, and a wiring harness. Some kits may also include two extra fuses and a relay. There are different types of HID conversion kits. They include the following:
-
By bulb type
Bulb types include D1, D2, D3, and D4. D2 bulbs are the most common and widely used in many vehicles. They are easy to install and affordable. D1 bulbs are less common and mainly used in high-end vehicles. D3 and D4 bulbs are not compatible with most vehicles.
-
By color temperature
Color temperatures range from 3000K to 12000K. 3000K bulbs have an amber color similar to traditional halogen lights. They are great for foggy and snowy conditions. 4300K bulbs produce a bright white light. They are ideal for most driving conditions. 5000K and 6000K bulbs emit a crisp white light with a tinge of blue. They are suitable for night driving. 8000K and 10000K bulbs have a blue to purple hue. They are mostly used for aesthetic purposes.
-
By brightness
The HID conversion kit can also be categorized by brightness. Some kits have 35W ballasts, while others have 55W ballasts. 55W ballasts are brighter than the 35W ones. The 35W ballasts produce around 3000 lumens. They are ideal for drivers who prefer moderate brightness. 55W ballasts generate up to 5000 lumens. They are suitable for drivers who want extremely bright headlights.
Specifications & Maintenance of Hid Conversion Kit
HID conversion kits are available in various specifications to cater to different vehicle needs. Here are some common HID conversion kit specifications:
-
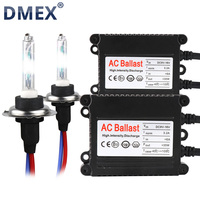
Ballast:
The ballast is available in standard and slim sizes. It also has different wattages, including 35W, 50W, and 55W. The 35W ballast is the most commonly used, while the 55W is brighter and produces more heat.
-
Bulb Size:
The HID bulbs come in various sizes to fit different vehicles. Some common sizes include D2S, D2R, D2C, H1, H3, H4, H7, H11, 9004, 9005, 9006, 9007, 9012, H13, 880, 881, and PSX24A. The D2S and D2R are the most common sizes.
-
Kelvin Rating:
The HID bulbs have different Kelvin ratings that determine the color temperature. The common ratings include 4300K, 5000K, 6000K, and 8000K. The 4300K has a bright white light that resembles daylight, while the 6000K has a cool white light. The 8000K has a bluish-white light.
-
Wattage:
The HID bulbs are available in 35W and 55W wattages. The 55W bulbs are brighter and produce more heat than the 35W bulbs.
-
Type of Bulb:
There are several types of HID bulbs, including D1S, D1R, D2S, D2R, D3S, D4S, H1, H3, H4, H7, H11, 9004, 9005, 9006, 9007, 9012, H13, 880, 881, and PSX24A. The D2S and D4S bulbs are the most common types.
Maintaining the HID conversion kit is crucial to ensure that it lasts and works properly. Here are some tips on how to maintain the HID conversion kit:
- Always clean the HID bulbs regularly using a microfiber cloth and a cleaning solution.
- Check for any signs of moisture, condensation, or damage in the ballast and HID bulbs.
- Ensure all the connections in the HID conversion kit are tight and secure.
- Replace any worn-out or damaged components in the HID conversion kit.
- Once or twice a year, take the vehicle to a professional to inspect the HID conversion kit.
How to Choose HID Conversion Kit
There are several factors to consider when choosing an HID conversion kit for business, including;
- Compatibility: The compatibility of the conversion kit with the vehicle is very important. Check the vehicle's make, model, and year of manufacture to determine the type of HID kit that will work. Also, check the stock headlight housing design and available space to see if it will accommodate the HID bulb.
- Quality: Quality is an important factor when choosing an HID conversion kit. This is because high-quality kits provide brighter light and last longer than cheaper ones. Look for kits from well-known manufacturers that use quality materials and meet industry standards. The HID kit should have CE, E4, RoHS, and ISO 9001 certifications. These certifications show that the kit has been tested and meets quality and safety standards.
- Ballast: The ballast is another important component of the HID conversion kit. It controls the power going to the bulb and is responsible for igniting the bulb. Choose an HID kit with a slim digital ballast. Digital ballasts provide stable power and faster ignition. Also, choose an HID kit with a 35W ballast. The 35W ballast is standard and works with most HID bulbs. It also produces enough power to ignite the bulb without overheating.
- Color temperature:
- HID bulbs come in different color temperatures measured in Kelvin. The color temperature affects the color of the light produced by the bulb.
- Bulb size: When choosing an HID conversion kit, consider the bulb size. HID bulbs come in different sizes identified by a two-digit number. The bulb size must match the one used in the vehicle's halogen headlights.
- Warranty: The warranty is important when choosing an HID conversion kit for resale. A warranty shows that the supplier is confident that the product will work. Most suppliers of HID conversion kits offer a warranty of 1 to 2 years. Some suppliers also offer a 30-day return policy.
Choose an HID kit with a color temperature that suits the vehicle's needs and local regulations. Most kits have a color temperature of 5000K to 6000K, which produces a bright white light. Some kits also have a color temperature of 8000K, which produces a blue-white light.
For example, an HID H1 conversion kit will use an H1 bulb size. The HID bulb sizes are H1, H3, H4, H7, H11, 9005, 9006, 9012, D2S, D2R, D3S, and D4S. If the kit does not have the same bulb size as the one in the vehicle, it will not fit into the headlight housing.
How to DIY and replace Hid conversion kit
One can easily convert halogen lights to HID by installing an HID conversion kit. The process is quite simple, and with the right tools, it can be done at home. The tools required to get the job done are a screwdriver, gloves, and electrical tape. The conversion process entails the following steps:
- 1. Choose the right kit: When choosing an HID conversion kit, select one that is compatible with the vehicle's make, model, and year. The kit should contain two ballasts, two HID bulbs, wiring, and installation instructions.
- 2. Prepare the vehicle: Before starting the installation process, park the vehicle in a well-lit, ventilated area. Turn off the ignition and make sure the car's electrical system is not operational. Open the hood and ensure there is enough space to work on the headlights.
- 3. Remove halogen bulbs: With a screwdriver, remove the screws holding the headlight lens and gain access to the headlight housing. Remove the halogen bulbs from the housing and disconnect the wiring. It is advisable to wear gloves when handling the halogen bulbs as they can be hot and cause burns.
- 4. Install the HID bulbs: The HID bulbs in the kit come with different shapes and sizes. Choose the one that perfectly fits into the headlight housing. The bulb should be carefully inserted into the housing and turned clockwise to secure it. Be careful not to touch the glass part of the bulb as it can cause the kit to malfunction.
- 5. Connect the ballasts: The ballast controls the power going to the HID bulb. It is connected to the vehicle's electrical system. First, open the vehicle's hood and locate the battery to install the ballast. The ballast's positive terminal is connected to the battery's positive side using the provided cable. The negative terminal of the ballast is connected to the battery's negative side.
- 6. Wire the ballast to the bulb: The ballast has two wires leading to the HID bulb. One wire connects to the bulb's ignitor, and the other connects to the bulb's electrode. This connection is usually plug-and-play, making it simple and straightforward.
- 7. Secure the ballast: Once the ballast is installed and the wires are connected, find a secure location to mount it inside the engine compartment. This helps to prevent it from moving around while driving.
- 8. Test the headlights: Before closing everything up, turn on the headlights to make sure they are working properly. If they don't light up, double-check all the connections to make sure they are secure and correct.
- 9. Reassemble the headlight housing: Once the HID lights are working properly, reattach the headlight lens and secure it with the screws. Close the hood and make sure everything is in place.
Q and A
Q1: Can one install HID bulbs without an HID conversion kit?
A1: It is possible to install an HID bulb in a vehicle without using an HID conversion kit. However, doing so may not be in the manufacturer's plans. Additionally, the process may be challenging and result in poor light output. The HID bulb may not be compatible with the factory housing, and the installation may require many modifications.
Q2: What are the benefits of using an HID conversion kit?
A2: An HID conversion kit allows the installation of HID bulbs in most vehicles. The kit helps to improve light output and overall visibility, making driving safer. Additionally, the kit is useful in upgrading older cars with halogen bulbs to give them a modern feel.
Q3: Do HID conversion kits come with warranties?
A3: Many HID conversion kits on the market come with warranties. The warranty period may range from one year to three years or more. When buying, check if the kit has a warranty and understand the terms and conditions. Some suppliers offer a money-back guarantee within a specified period.