toyota camry cv joint

toyota camry cv joint

toyota camry cv joint

toyota camry cv joint

toyota camry cv joint

toyota camry cv joint

toyota camry cv joint
toyota camry cv joint
toyota camry cv joint

toyota camry cv joint
toyota camry cv joint

toyota camry cv joint

toyota camry cv joint
toyota camry cv joint

toyota camry cv joint

toyota camry cv joint
toyota camry cv joint
toyota camry cv joint
toyota camry cv joint

toyota camry cv joint

toyota camry cv joint
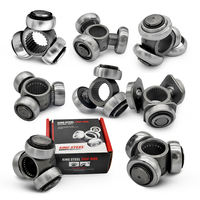
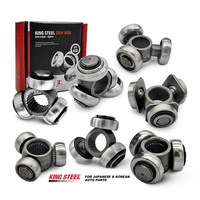
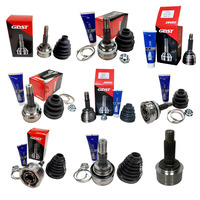
Types of Toyota Camry CV Joint
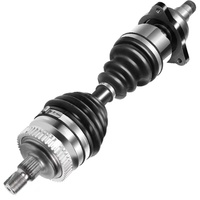
The is a key component of the Toyota Camry’s drivetrain, allowing power transmission from the transmission to the wheels while accommodating suspension movement. Understanding the types of CV joints and their functions is crucial for sourcing and supply chain professionals.
There are two main types of CV joints:
- Double-Cardan Joint: This joint comprises two U-joints and a cross assembly. It provides smooth operation for heavy-duty applications like four-wheel drive. The Double-Cardan Joint effectively handles angular misalignments, ensuring optimal torque transmission. However, it requires more frequent maintenance and precise assembly to function correctly.
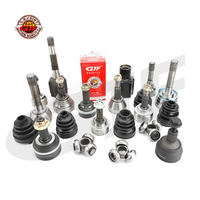
- Constant Velocity Joint: This joint is designed to maintain a constant speed of rotational power transfer between the engine and wheels. The Constant Velocity Joint is further divided into two types:
- A) T-Bone CV Joint: The T-Bone CV Joint, also known as the T-Bone Joint or T-Bone Shaft, is shaped like a "T." It connects the drive shaft to the wheel hub, allowing up-and-down movement. This joint is commonly used in front-wheel-drive vehicles like the Toyota Camry. The T-Bone CV joint is more compact and efficient at transferring power to the wheels. However, it may require more frequent lubrication and maintenance to ensure optimal performance and longevity.
- B) Rzeppa CV Joint: The Rzeppa CV Joint is the most prevalent type of Toyota Camry CV joint. It consists of a housing, balls, and an inner and outer race. The Rzeppa Joint provides smooth power transmission and accommodates angular misalignment between the drive shaft and wheels. This joint is widely used in front-wheel-drive and all-wheel-drive vehicles like the Toyota Camry. The Rzeppa CV Joint is highly efficient at transferring torque to the wheels, ensuring optimal vehicle performance. However, it may be more expensive and require specialized tools for installation and maintenance.
Specifications and Maintenance of Toyota Camry CV Joint
Here are some general specifications for the Toyota Camry's CV joints:
-
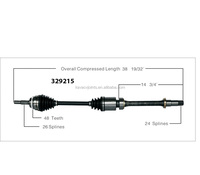
1. Size
The size of the Toyota Camry's CV joints varies depending on the model year and the specific drivetrain configuration (front-wheel drive or all-wheel drive). Generally, the CV joints are compact, measuring a few inches in diameter.
-
2. Material
CV joints are typically made from durable materials such as steel or alloy steel. These materials provide strength and wear resistance, which are essential for handling the high torque and loads experienced during vehicle operation.
-
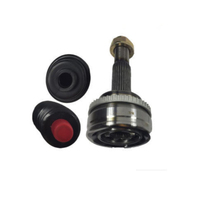
3. Type
The Toyota Camry commonly uses two types of CV joints: ball-type joints and tripod-type joints. Most modern Camry models use the more common and durable ball-type joints.
-
4. Lubrication
The CV joints are internally lubricated with high-performance grease. This grease reduces friction, dissipates heat, and ensures smooth joint operation. The lubrication is typically sealed within the CV joint housing to prevent leakage and contamination.
-
5. Boot
Each CV joint is covered with a boot to protect it from dirt, moisture, and debris. These boots are usually made of rubber or thermoplastic materials. They are essential for maintaining the CV joint's longevity by keeping the lubricant inside and contaminants outside.
-
6. Load Capacity
The CV joints are designed to handle the torque and loads generated by the engine and transmitted through the drivetrain. The load capacity varies depending on the joint's size and design, ensuring it can handle the power requirements of the specific Camry model.
However, here are some general maintenance tips for CV joints:
-
1. Regular Inspection
It's important to regularly inspect the Toyota Camry CV joints for any signs of wear or damage. Look out for cracks or tears in the boots as they can allow dirt and moisture to enter the joints and cause premature failure.
-
2. Boot Condition
The condition of the CV joint boots is critical for joint longevity. Ensure the boots are intact and free from damage. If any cracks or tears are noticed, replace the boots promptly to protect the joints.
-
3. Proper Lubrication
The Toyota Camry CV joints are pre-lubricated with high-performance grease, which is usually sufficient for their lifespan. However, some models may require periodic re-lubrication. Check the owner's manual or consult a professional mechanic to know if re-lubrication is necessary for the specific Camry model.
-
4. Cleanliness
Keep the CV joints and surrounding areas clean to prevent dirt and debris from entering the joints. If driving in harsh or off-road conditions, consider cleaning the joints regularly to ensure optimal performance and durability.
-
5. Proper Installation
If replacing or repairing CV joints, ensure proper installation according to the manufacturer's specifications. Improper installation can cause joint misalignment and premature wear.
-
6. Avoid Excessive Angles
The CV joints are designed to operate at specific angles. Avoiding sharp turns or excessive angle conditions is essential, as this can cause excessive stress and wear on the joints.
How to Choose a Toyota Camry CV Joint
Choosing the right Toyota Camry CV joint requires careful consideration of several factors.
-
Understand the Needs
Consider the driving habits and conditions. For instance, a heavy-duty CV joint would be ideal for someone driving on rugged roads.
-
Research
Look into the options available for the Toyota Camry CV axle. Different generations of the Camry may have variations in the CV joint specifications.
-
Quality over Price
While it may be tempting to go for the most affordable option, prioritize quality. A higher-quality CV joint may have a higher price tag but will offer better performance and durability.
-
Brand Matters
Consider the brand when choosing a Toyota Camry CV joint. Well-known brands often provide better quality and reliability compared to lesser-known brands.
-
Warranty
Look for a warranty when choosing a CV joint. A warranty is often a sign that the manufacturer trusts the product's quality.
-
Consult a Professional
If uncertain about which CV joint to choose, consult a mechanic or professional. They can provide guidance based on their experience and expertise.
How to DIY and Replace Toyota Camry CV Joint
Replacing the Toyota Camry CV joint is a complicated process that many users may not be able to do. However, if they have the necessary mechanical skills and knowledge, they can replace it. Before replacing it, users should read the repair manual to understand how it works. Below are the general steps to replace the CV joint:
First, gather the necessary tools for the replacement. These include:
- Jack and jack stands
- Socket set
- Wrench set
- Torques wrench
- New CV joint or complete axle assembly
- Grease
- Boot clamp or tie
- Hammer
- Puller
- Installer
After gathering the tools, follow the steps below:
-
1. Lift the Vehicle
Lift the vehicle and place it on a level surface. After that, engage the parking brake and put wheel chocks on the wheels that remain on the ground. Then loosen the wheel lug nuts and raise the vehicle with a jack. After the vehicle is raised, place the jack stands under the vehicle. Now, the CV joint is accessible.
-
2. Remove the Wheel and Axle Nut
Remove the wheel completely by unbolting the lug nuts. After that, unbolt the axle nut to disconnect the CV joint from the wheel.
-
3. Remove the Suspension Components
Remove the suspension components that are connected to the CV joint.
-
4. Remove and Replace the CV Joint
Now, use a puller to remove the CV joint from the axle. After that, install the new CV joint onto the axle with the grease. Ensure the joint's splines align with the axle. Then, reinstall the suspension components.
-
5. Reassemble and Test
Reassemble everything that was removed. This includes the axle nut and wheel. Lower the vehicle and remove the jack stands. Start the engine and take a test drive to confirm that the CV joint is working properly.
Q and A
Q1: Can any Camry’s CV axle be installed on another Camry?
A1: No, CV axles are not interchangeable between different Camry models. Each Camry model has a CV axle specifically designed to match its drivetrain configuration.
Q2: What are the signs of a bad CV joint?
A2: The CV joint is the most important part of the axle. A bad CV joint can damage the entire axle. Signs of a bad CV joint include clicking or popping sounds when turning, vibrations during acceleration, visible grease leaks, and reduced joint flexibility.
Q3: Can the CV joint be repacked?
A3: Repacking is not a standard practice for sealed CV joints like the ones used in most Camry models. These joints come pre-filled with grease and sealed in a boot. If the boot is damaged, the entire joint usually needs replacement rather than repacking.
Q4: How long does it take to replace a CV joint?
A4: Replacing a CV joint can take anywhere from 1 to 3 hours, depending on the Camry model and the mechanic’s experience.
Q5: Is it necessary to replace both CV joints on a Camry?
A5: It is not mandatory to replace both CV joints. However, replacing them in pairs is recommended to ensure even wear and optimal performance, especially on older Camry models with independent front suspension.